
A very good question was asked in in the comments section of the following post about creating custom hatches [found here]. That post was about creating custom hatches using lines within a 1×1 square and then having the ability so save that custom hatch pattern to its own file and copying the contents into the bottom of your ACAD.PAT file that is located in your ACAD support path. The hatch pattern LISP routine was originally posted at Cadalyst.com 10 years ago and still works great (see why I like LISP so much) it can be [found here].
The question was basically – Why wont this routine work even though I am using nothing but lines and they all fit into the 1×1 square?
I was sent the file that had the linework and I had the same results.
Here is a snap shot of the desired hatch pattern.

During the SAVEHATCH portion of the routine it showed errors in the command line history of “invalid angles”…
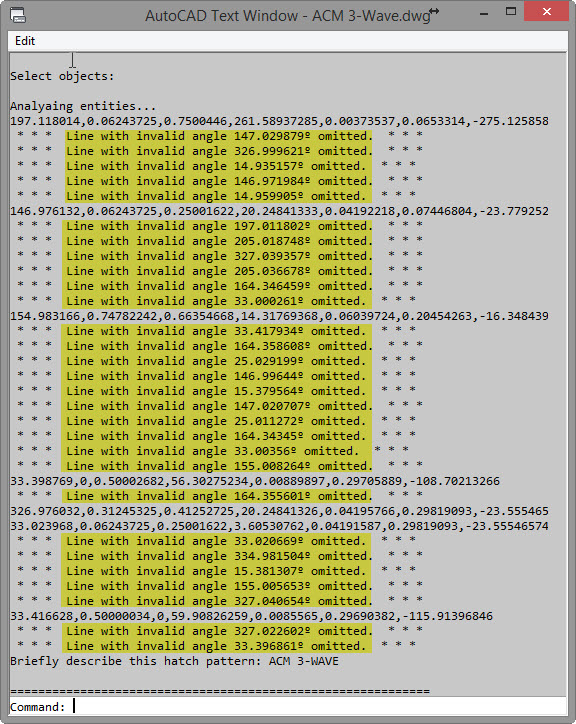
So I tried changing UNITS and “Angle Type” but I still got this error and gave up on trying to figure that out.
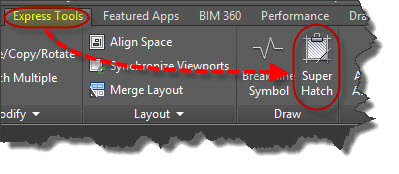
Welcome to Express Tool SUPERHATCH!!!
First make a block of the objects that you want to define your hatch pattern.

Then launch the SUPERHATCH command. Also found on the Express Tools tab > Draw panel > Super Hatch
(Note: there are many options and ways of using this tool so I would suggest looking into the various options by hitting the F1 button after launching the tool)
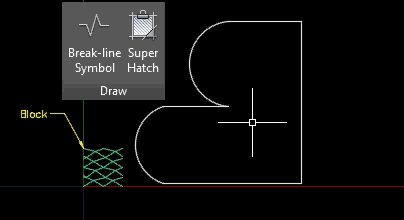
Super Tip: One of my favorite uses of this tool is that you can make a hatch pattern out of curved objects!!!
There is also a great video by Lynn Allen demonstrating how to use SUPERHATCH and applying images as a hatch [found here]
The prompts for using a block are shown above and are listed below:
- Select “Block” from the Super Hatch menu
- Select the block name from the “Super Hatch – Insert” dialog box and click “OK”
(The next few prompts are similar to inserting a block)
- Specify an Insertion point:
- Specify the X scale factor:
- Specify the Y scale factor:
- Specify the rotation angle:
- Is the placement of this BLOCK acceptable? <Yes>
- Specify block [Extents] First Corner <magenta rectang>:
- Other corner:
- Specify an option [Advanced options] <Internal point>: Pick inside of enclosed area to apply the hatch
- hit Enter
Notice that after the hatch has been applied that it is now a “group” and not a true hatch. So if you decide to modify the boundary, it will not be “associative”

Very cool trick.