We recently were given some 3D models by a subcontractor that needed to be incorporated into our drawings. There was one model in particular that was rather large in file size considering that it was only a small part of our overall design for the project. And to top it off, the 3D model from the subcontractor was to be placed about 11 times throughout the overall model. Even when the large file was brought into the drawing as an XREF, many of the AutoCAD designers experienced loading times of about 10 minutes.
The file size of the large model is almost 50 megabytes even after trying many methods to reduce its size. The method that we found that worked wonders was to use a FLATSHOT representation of the 3D model as a substitute for the 3D model.
Here’s how:
Below is a view of the piece of equipment that is 50 megabytes.
Below is a top view of the large file. This view is all that a majority of the designers needed to see in their drawings
The FLATSHOT command can be used at the command line or the tool can be found on the ribbon under the “3D Modeling” workspace under the “Home” tab > “Section” panel (dropdown) > “FLATSHOT”
Note: that the view that is currently being shown on-screen will be used to produce the FLATSHOT version of the model. Think of this command as you orient your view of a 3D model and then take a picture with a camera. That picture is now the flattened 2d representation of the 3D model.
Keeping that in mind, if needed we could go to the side elevation views of the 3D model and produce FLATSHOT versions of those views so that they could be incorporated into someone’s drawing as well – thus reducing the time of opening the larger file.
For this instance, I used the following settings to produce the FLATSHOT.
I suggest playing with the various settings to meet the needs of your particular project.
Once the FLATSHOT file is created it is a good idea to open the file and try to clean it up further. Some commands that might help are: OVERKILL, PURGE, JOIN, AUDIT
Below is a file size comparison of the large 3D model, the FLATSHOT version and the cleaned up FLATSHOT
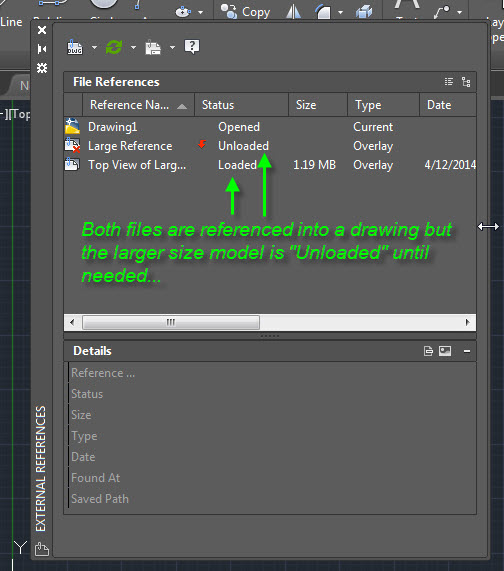
Now that we have a 2D version of the 3D model, the designers simply unload or detach the larger model from the XREF Manager in AutoCAD and load the FLATSHOT version.
Note: it is important to assign a person to take resposibility of keeping the 3D model and the FLATSHOT version in synch. If the 3D model was to be altered or moved in some way, the FLATSHOT would need to be updated so that everyone is using the most current data. In our instance at work, the large 3D model was not going to change through the project so it was an easy 1-time solution.


Very nice tip.
Thanks
Gouhar
I have used FLATSHOT occasionally for several years now and have never been disappointed.
Thanks – I was not aware of this command. I remember using DXBOUT to do this, back in olden days. (Yes, I’m a dinosaur.) Glad they have this now.
Ken,
I just tried your batch tool and love it. Thank you for spending the time and (freely) sharing such a great tool. Move over ScriptPro.
After I play with it some more I will do a blog post and a link to your site. There are many great tools that you have developed.
Thanks
~Greg
Hi Greg,
I’m happy that you found the KCS Batch utility and like it, and I would be pleased if you do a write-up.
Best regards,
Ken