
AutoCAD table objects are great in how they act similar to Microsoft Excel allowing you to add columns and rows and with the controls available, you can format the table in many ways to add style to the table.
Today’s tip is useful for tables that are long in length. If the table is long in length and you scale it to fit on a sheet in order to print, everything might be too small and run together, thus making your print unreadable.
Below is a simple example of an AutoCAD table (note: it isn’t a very long table…)

To get the table to “break” and have a continuation:
- Select the Table
- Click the arrow grip at the bottom-middle of the table

Click to re-position the arrow grip somewhere higher on the screen (within the table). You should see the table overflow into new columns to the right.
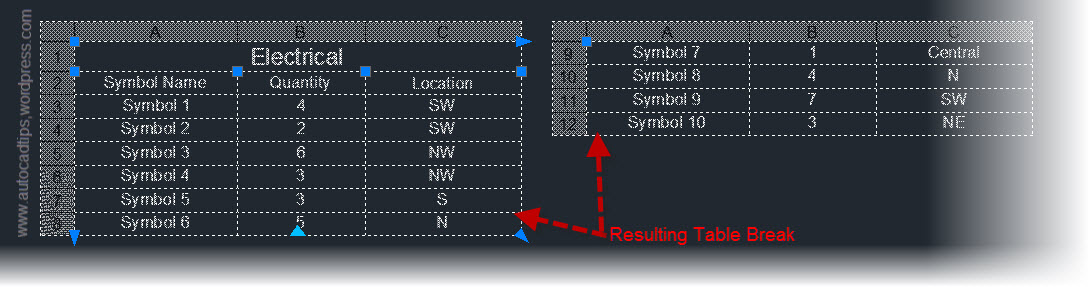
The distance that you defined by re-positioning the arrow will be the new length for this table. So as new rows are added to the table, once the table reaches that defined length it will overflow once more into a third column.
Displaying The Labels In The Table Breaks:
Once these table breaks have been applied, you can add the descriptive top area of the table that is shown in the first rows of the table. This will help clarify what the second column is in the third table break for instance.
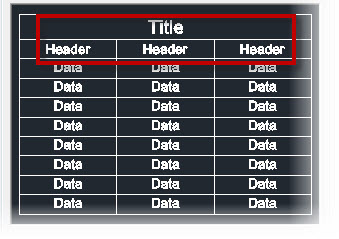
The first 2 rows of the table are called “Labels” and can be designated as a “Header” or “Title.” (These are defined in the Table Style manager). The important thing to know is that if both a “Title” and “Header” are defined, they are BOTH considered a label and will be repeated.
To turn on the repeating labels:
- Select the Table
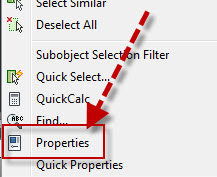
- Right-Click and select “Properties” to open the properties palette
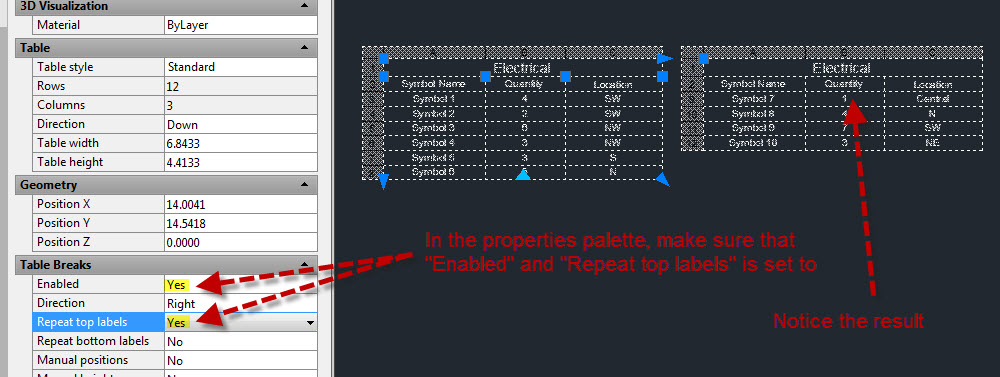
- In the properties palette, scroll down to the “Table Breaks” section
- Change “Enabled” to “Yes”
- Change “Repeat top labels” to “Yes”
- The result should be a repeated “Label” in the Table Breaks

Is there a way to center break the table? So the center of the split table is the center of the original unsplit table.
Rick, if you mean that you want the split table to be centered below the original table, try changing the “Direction” of the table break to “Down” in the table’s properties pallette. That will place the split table directly below and centered with the original table.
■Select the Table
■Right-Click and select “Properties” to open the properties palette
■In the properties palette, scroll down to the “Table Breaks” section
■Change “Direction” to “Down”
You might also try changing “Manual Positions” to “Yes.” You can then manually move the split table around by selecting the grip on the split table and moving it.
■Select the Table
■Right-Click and select “Properties” to open the properties palette
■In the properties palette, scroll down to the “Table Breaks” section
■Change “Manual positions” to “Yes”
I hope that helps.
any way to have just the header repeate and not the title? Or have the title encompass the whole table when split?