I have briefly mentioned the blend command [here] but I actually never showed how to use the command.
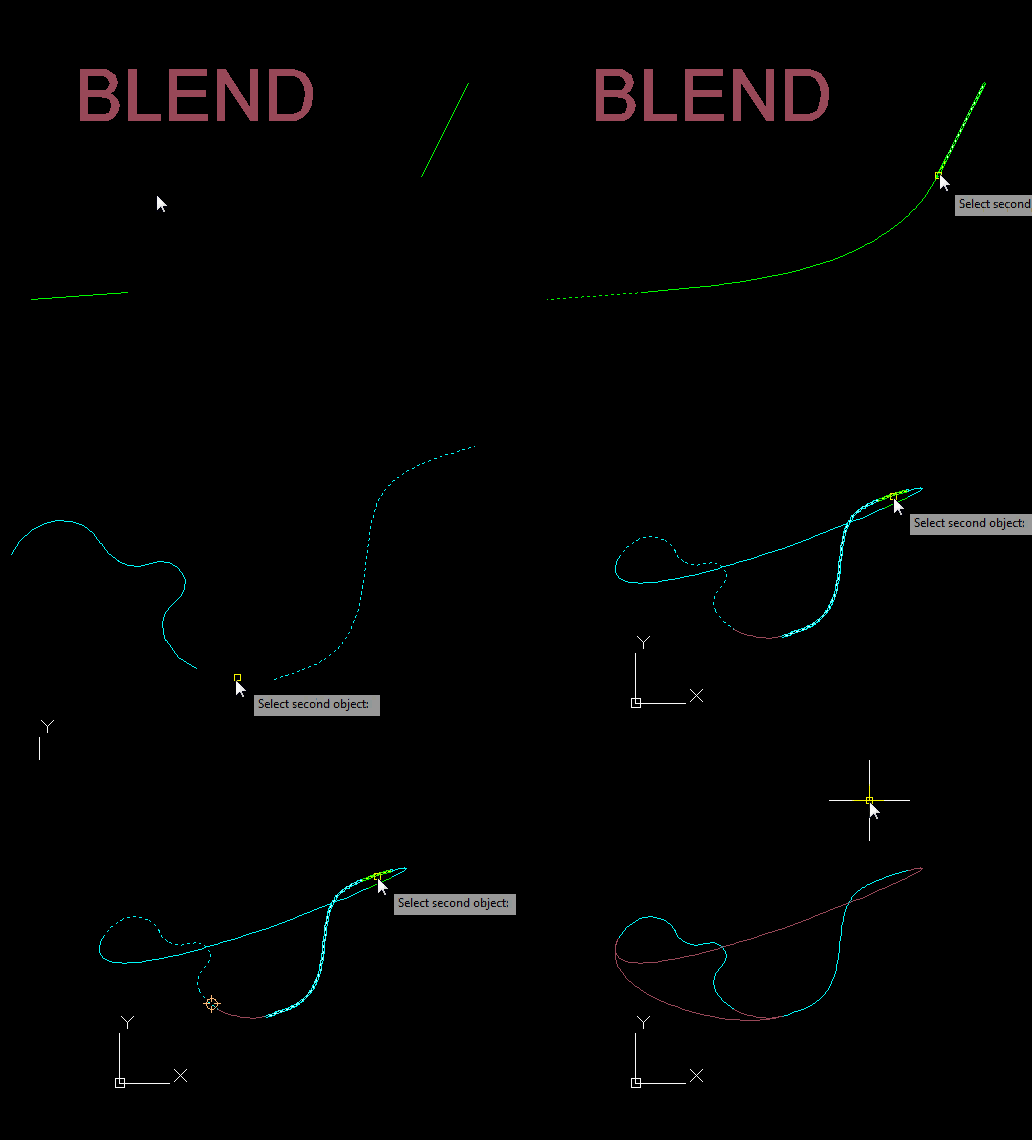
The BLEND command is found on the Home tab of the ribbon > Modify panel > Under the Fillet/Chamfer dropdown, there is the new blend tool. will let you select two objects and from their endpoints, this command will create a spline that is tangent from their endpoints.
The power of this tool is that the endpoints don’t have to be a natural continuation. Otherwise, the Fillet command would suffice. One tip that I figured out with this command is that after you select the first object, if you hit the up and down buttons, you can toggle between the possible final endpoint.
Here’s how:
- BLEND <enter>
- Select near the endpoint of the first object.
- Before you select the second object, hover over it and you will see a preview of how the final blend will look. Select the second object.


Pingback: AutoCAD 2013: Offset Preview | AutoCAD Tips